UnCrackable-Level2.apk
直接安装+打开,又是解密。
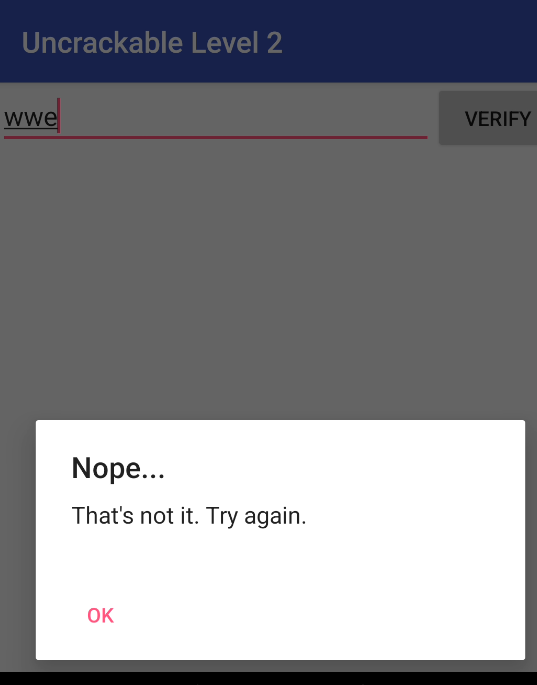
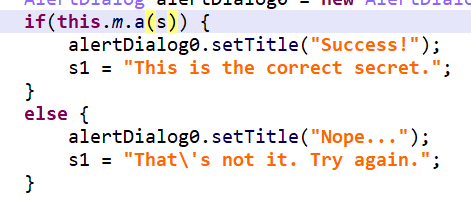
搜索Nope,定位到this.m.a(s)。
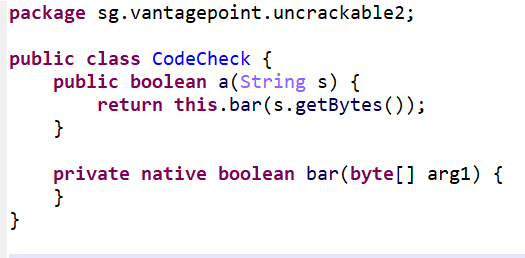
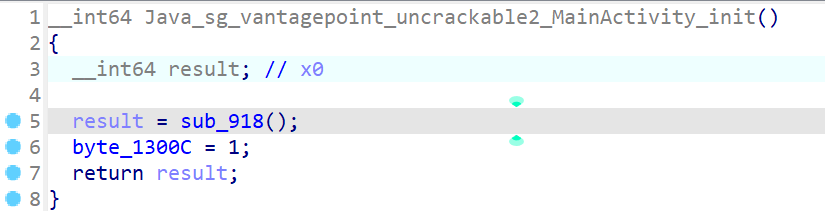
在类MainActivity中,有一个私有对象m,m属于类CodeCheck,调用了函数a,最后调用了native层函数bar。
native层需要ida进行静态分析,这里将apk进行解压,取出其中的arm64架构的so库放入ida中,可以看到两个导出函数。
Java_包名_类名_函数名,可以看出bar就是我们要找的函数。

一眼看出,v7对应的字符串就是正确的secret。
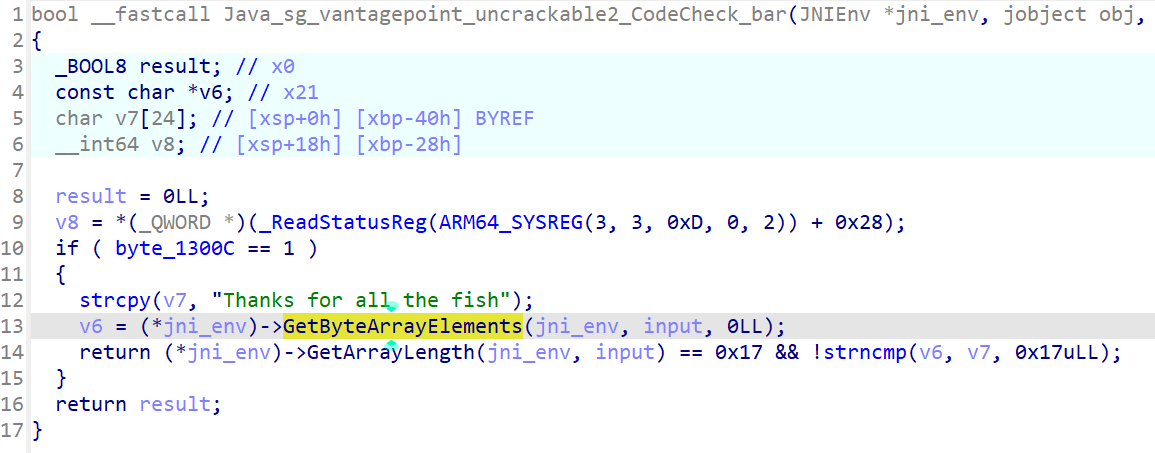
再看看导出的init函数,这里ida并没有给出JNIEnv和jobect,应该是反编译失误——这俩参数没用到,可能被优化了。
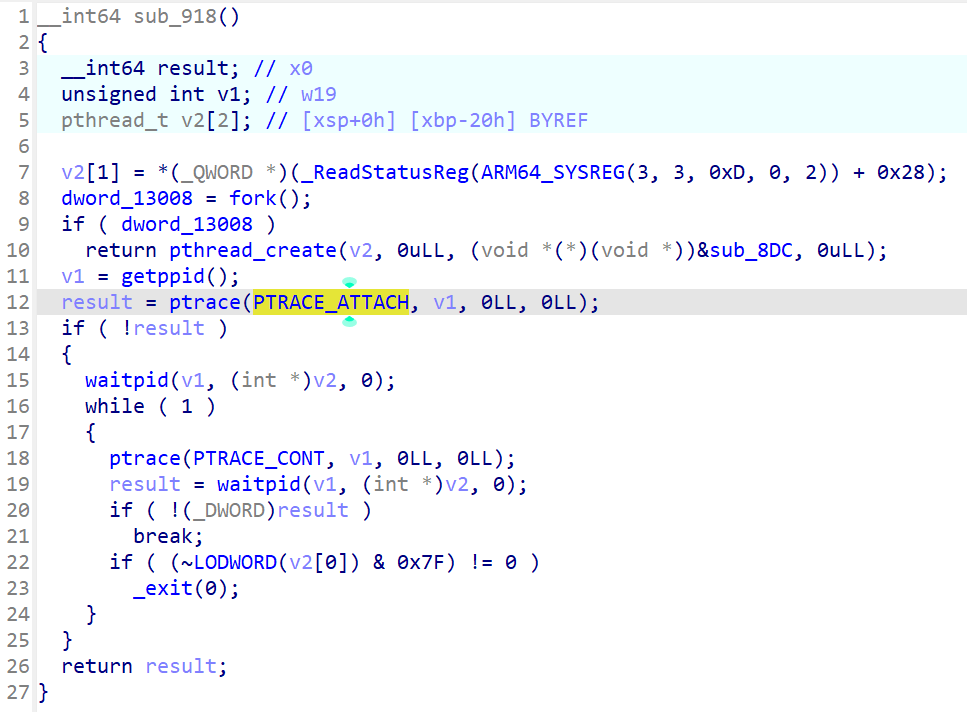
在sub_918中,可以发现:fork出子进程,然后子进程通过ptrace附加到父进程,使得父进程无法其它调试器被再次附加,一个反调试技术。
Frida通过Interceptor模块,可以支持对Native层函数的hook。
下面这个脚本,先通过Module.findBaseAddress找到so模块的基地址,然后通过导出表符号Java_sg_vantagepoint_uncrackable2_MainActivity_init,找到它的函数地址,然后根据在文件中计算的文件偏移量,计算出要hook的无符号函数的地址。
1
2
3
4
5
6
7
8
9
10
11
12
13
14
15
16
17
18
19
20
21
22
23
24
25
26
27
28
29
30
31
32
33
34
35
36
37
38
39
40
41
42
43
44
45
46
47
48
49
50
51
52
| Java.perform(() => {
const LIB_NAME = 'libfoo.so';
const EXPORT_SYMBOL = 'Java_sg_vantagepoint_uncrackable2_MainActivity_init';
const OFFSET = ptr(-1140);
function tryHook() {
const moduleBase = Module.findBaseAddress(LIB_NAME);
if (!moduleBase) {
console.log(`[!] ${LIB_NAME} 未加载,等待...`);
setTimeout(tryHook, 1000);
return;
}
console.log(`[+] 模块基地址: ${moduleBase}`);
const exportAddress = Module.getExportByName(LIB_NAME, EXPORT_SYMBOL);
if (!exportAddress) {
console.error(`[!] 未找到导出函数 ${EXPORT_SYMBOL}`);
return;
}
console.log(`[+] 导出函数地址: ${exportAddress}`);
const targetAddress = exportAddress.add(OFFSET);
console.log(`[+] 目标函数地址: ${targetAddress}`);
const bytes = Memory.readByteArray(targetAddress, 5);
const byteArray = new Uint8Array(bytes);
const hexBytes = Array.from(byteArray).map(b => b.toString(16).padStart(2, '0')).join(' ');
console.log(`[+] 前5个字节: ${hexBytes}`);
Interceptor.attach(targetAddress, {
onEnter: function(args) {
console.log(`\n=== 函数调用开始 ===`);
if (Process.arch === 'arm64') {
console.log(`X0: ${args[0]}, X1: ${args[1]}, X2: ${args[2]}`);
} else {
console.log(`R0: ${args[0]}, R1: ${args[1]}, R2: ${args[2]}`);
}
},
onLeave: function(retval) {
console.log(`返回值: ${retval}`);
console.log(`=== 函数调用结束 ===\n`);
}
});
console.log(`[√] Hook 安装成功`);
}
setTimeout(tryHook, 1000);
});
|
然而还不够,即便hook住了这个函数,但这个函数早已经在MainActivity.onCreate阶段执行了,hook了也没用,因为已经执行过了一遍。
针对执行时机的问题,有以下解决方法:
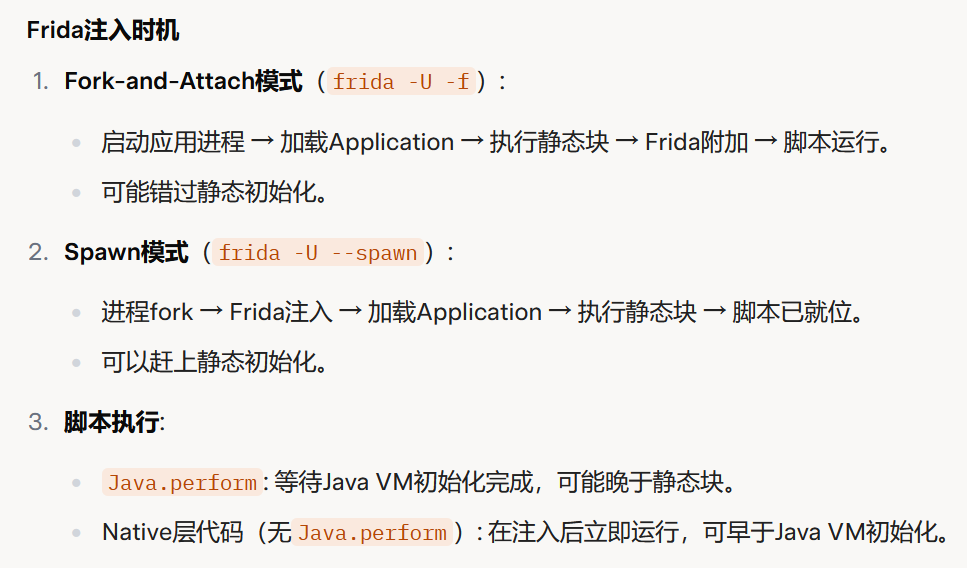
1.使用spawn模式,默认的frida -U -f是“fork-and-attach”模式,可能错过早期逻辑。使用“spawn”模式可以在应用进程创建时注入Frida。
如:frida -U -l script.js –no-pause -f com.example.app –spawn
–spawn: 在进程创建时注入,而不是附加到已有进程。
2.hook系统类System,然后对loadLibrary做手脚,如果加载的是其它库,不做处理;如果加载的是foo.so,则立马进行覆盖。这个hook的时机发生在静态初始化块执行之前。
1
2
3
4
5
6
7
8
9
10
11
12
13
14
15
16
17
18
19
20
21
22
23
24
25
| Java.perform(() => {
const LIB_NAME = 'libfoo.so';
const EXPORT_SYMBOL = 'Java_sg_vantagepoint_uncrackable2_MainActivity_init';
const OFFSET = ptr(-1140);
Java.use('java.lang.System').loadLibrary.implementation = function(libName) {
console.log(`[+] 加载库: ${libName}`);
this.loadLibrary(libName);
if (libName === 'foo') {
const moduleBase = Module.findBaseAddress(LIB_NAME);
if (!moduleBase) return;
const exportAddress = Module.getExportByName(LIB_NAME, EXPORT_SYMBOL);
const targetAddress = exportAddress.add(OFFSET);
Interceptor.replace(targetAddress, new NativeCallback(function() {
console.log(`sub_918 被调用并覆盖`);
return 42;
}, 'int64', []));
console.log(`[√] sub_918 已替换`);
}
};
});
|
3.Hook MainActivity.onCreat。
所以接下来这段脚本执行时机如下,在静态初始化块执行后(System.loadLibrary导入libfoo.so),在onCreate执行前(调用Java_sg_vantagepoint_uncrackable2_MainActivity_init之前),hook了类MainActivity,然后在它执行前,将sub_918的内容做了替换。
1
2
3
4
5
6
7
8
9
10
11
12
13
14
15
16
17
18
19
20
21
22
23
24
25
26
| Java.perform(() => {
const LIB_NAME = 'libfoo.so';
const EXPORT_SYMBOL = 'Java_sg_vantagepoint_uncrackable2_MainActivity_init';
const OFFSET = ptr(-1140);
const MainActivity = Java.use('sg.vantagepoint.uncrackable2.MainActivity');
MainActivity.onCreate.implementation = function(savedInstanceState) {
console.log('[+] MainActivity.onCreate 被调用');
const moduleBase = Module.findBaseAddress(LIB_NAME);
if (moduleBase) {
const exportAddress = Module.getExportByName(LIB_NAME, EXPORT_SYMBOL);
const targetAddress = exportAddress.add(OFFSET);
Interceptor.replace(targetAddress, new NativeCallback(function() {
console.log(`sub_918 被调用并覆盖`);
return 42;
}, 'int64', []));
console.log(`[√] sub_918 已替换`);
}
this.onCreate(savedInstanceState);
};
});
|
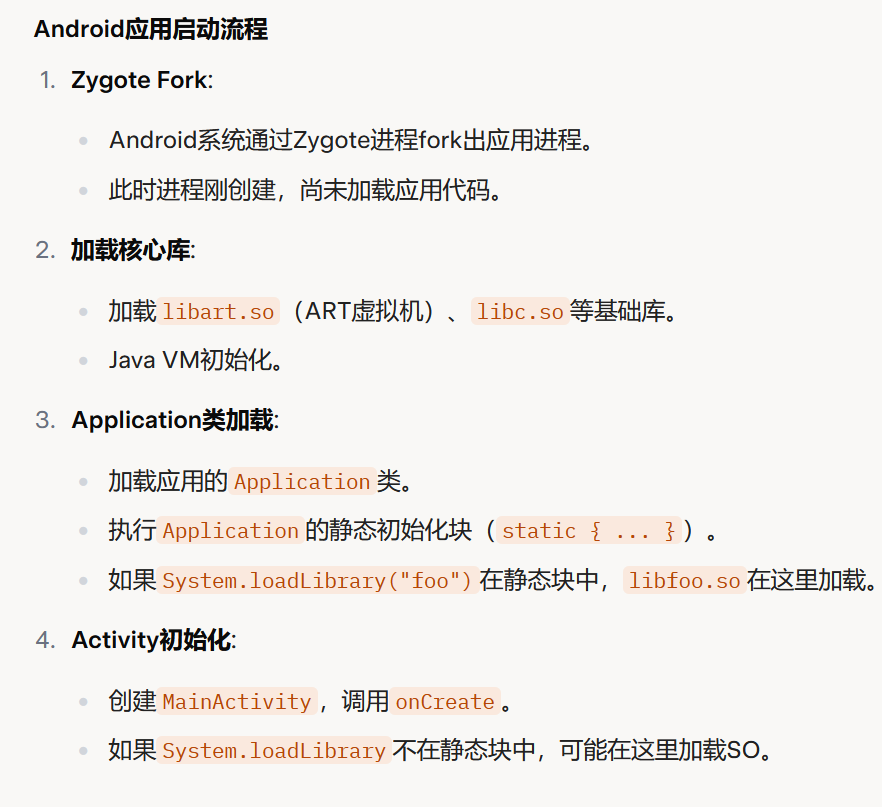
下图是安卓的初始化过程以及注入时机。
之后尝试一下hook是否执行成功,先将脚本断掉,直接通过jeb调试进程。
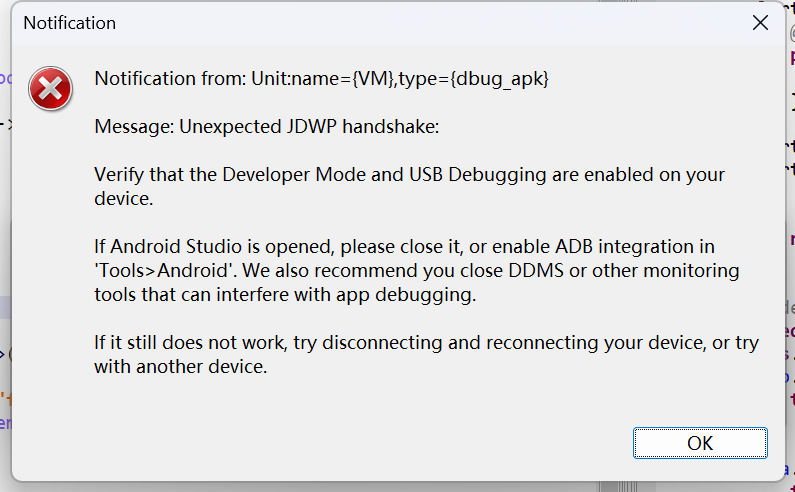
再试试通过frida进行hook后,能否attach上去调试。
确实是attach上去了,但是手机上显示被检测到了调试,根据字符串搜索,发现问题来自于下图。
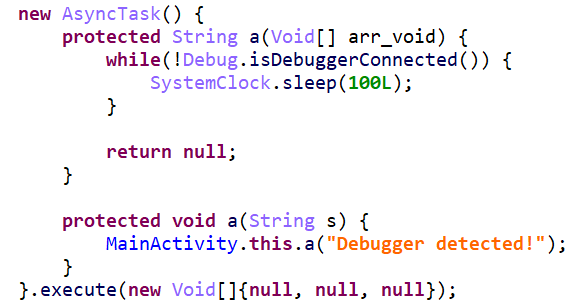
有一个持续检测的进程,阿这,这么防着咱。。。
只需要hook Debug.isDebuggerConnected()即可,让它一直返回false,这里就不写了。